Stretching Equipment Guide: Straps, Bands and a First Stretch
Compare nonelastic straps and elastic bands, choose working length, thread conventional D-rings, rehearse release and try one supported first stretch.
Choose stretching equipment by the job it needs to do. A nonelastic strap bridges the distance between your hands and a comfortable position. An elastic resistance band lengthens under tension and adds a force you must control. Similar names on a package do not make them interchangeable.
For a first strap session, learn a secure handhold, enough working length and an easy release before adding more stretches. This guide compares the main designs, explains conventional D-ring threading and gives one supported hamstring example, followed by simple movement choices for shoulder, back and ankle goals.
Yoga strap vs stretching strap vs elastic band
A yoga strap is commonly flat nonelastic webbing, sometimes with a buckle. A multi-loop stretching strap has sewn openings for different handholds. Sellers may use yoga strap and stretching strap for either design, so inspect the actual structure and instructions. A carrying sling or lifting strap is not automatically an exercise stretch strap.
| Structure | What it offers | What to check |
|---|---|---|
| Nonelastic multi-loop strap | Fixed handholds along the webbing. | Loop positions, stitching and usable reach. |
| Nonelastic D-ring strap | An adjustable closed loop when correctly threaded. | Buckle route, flat webbing and required spare tail. |
| Elastic resistance band | A changing force as the material stretches. | Exact design, allowed stretch and a controlled return. |
OPTP's Stretch Out Strap is a maker example of the multi-loop structure. Fixed openings can provide a repeatable handhold, but the next loop may be too close for a comfortable grip. A loop number is not a flexibility score.
A D-ring design allows smaller changes to the closed loop, with extra setup to check. Other buckles differ: Manduka's prop guidance describes distinct closure designs. Double-square, interlocking and quick-release fittings need their own directions; do not apply a conventional D-ring route simply because the webbing looks similar.
Equipment examples: check what the kit contains
The PBGGAME cork blocks with D-ring yoga strap contains two blocks and one strap. Consider it if you want both types of prop; the first supported stretch below does not require the blocks. Confirm usable strap length and the model's own setup directions before choosing it.
The PBGGAME four-loop resistance-band set contains four elastic loops and a door anchor. The hand-held movement examples here do not need the anchor. Select a loop only if its actual tension and instructions suit the task; the set's format does not make every loop light or suitable for a beginner.
What length yoga strap do you need?
Working length is the usable distance between your contact points after making the loop and taking a comfortable grip. The length printed on the package is the total webbing. A buckle turn, loop around a foot, both handholds and the spare tail all use some of that total.
Six, eight and ten feet are common maker-listed sizes, approximately 1.83, 2.44 and 3.05 metres. These are product options, not height or flexibility standards. The Hugger Mugger strap guide discusses those lengths and conventional threading. Choose from the connection your actual exercise requires.
- Name the setup: for example, hands to a supported raised foot rather than an unspecified yoga pose.
- Check that you can hold with relaxed shoulders and usable hand contact, not a fingertip pinch at the end.
- Allow the buckle's required spare tail. There is no universal tail allowance for every model.
- For sewn loops, check spacing and accessible end positions as well as total length.
- Manage extra webbing clear of feet and furniture, without wrapping it tightly around a wrist or neck.
Measure a real strap laid flat and unloaded when comparing options; do not use a tape measure as stretching equipment. A longer strap may bridge reach more comfortably, but it cannot make an unsuitable movement appropriate. A shorter handhold should never become a way to force the body farther.
How to thread a yoga strap with two D-rings
Use this sequence only for a conventional pair of matching D-shaped rings sewn into one end of nonelastic webbing. Work on a table without a limb inside the loop. Inspect the webbing, ring attachment and loose tail; damaged seams, a sharp edge or distorted hardware belong out of use.
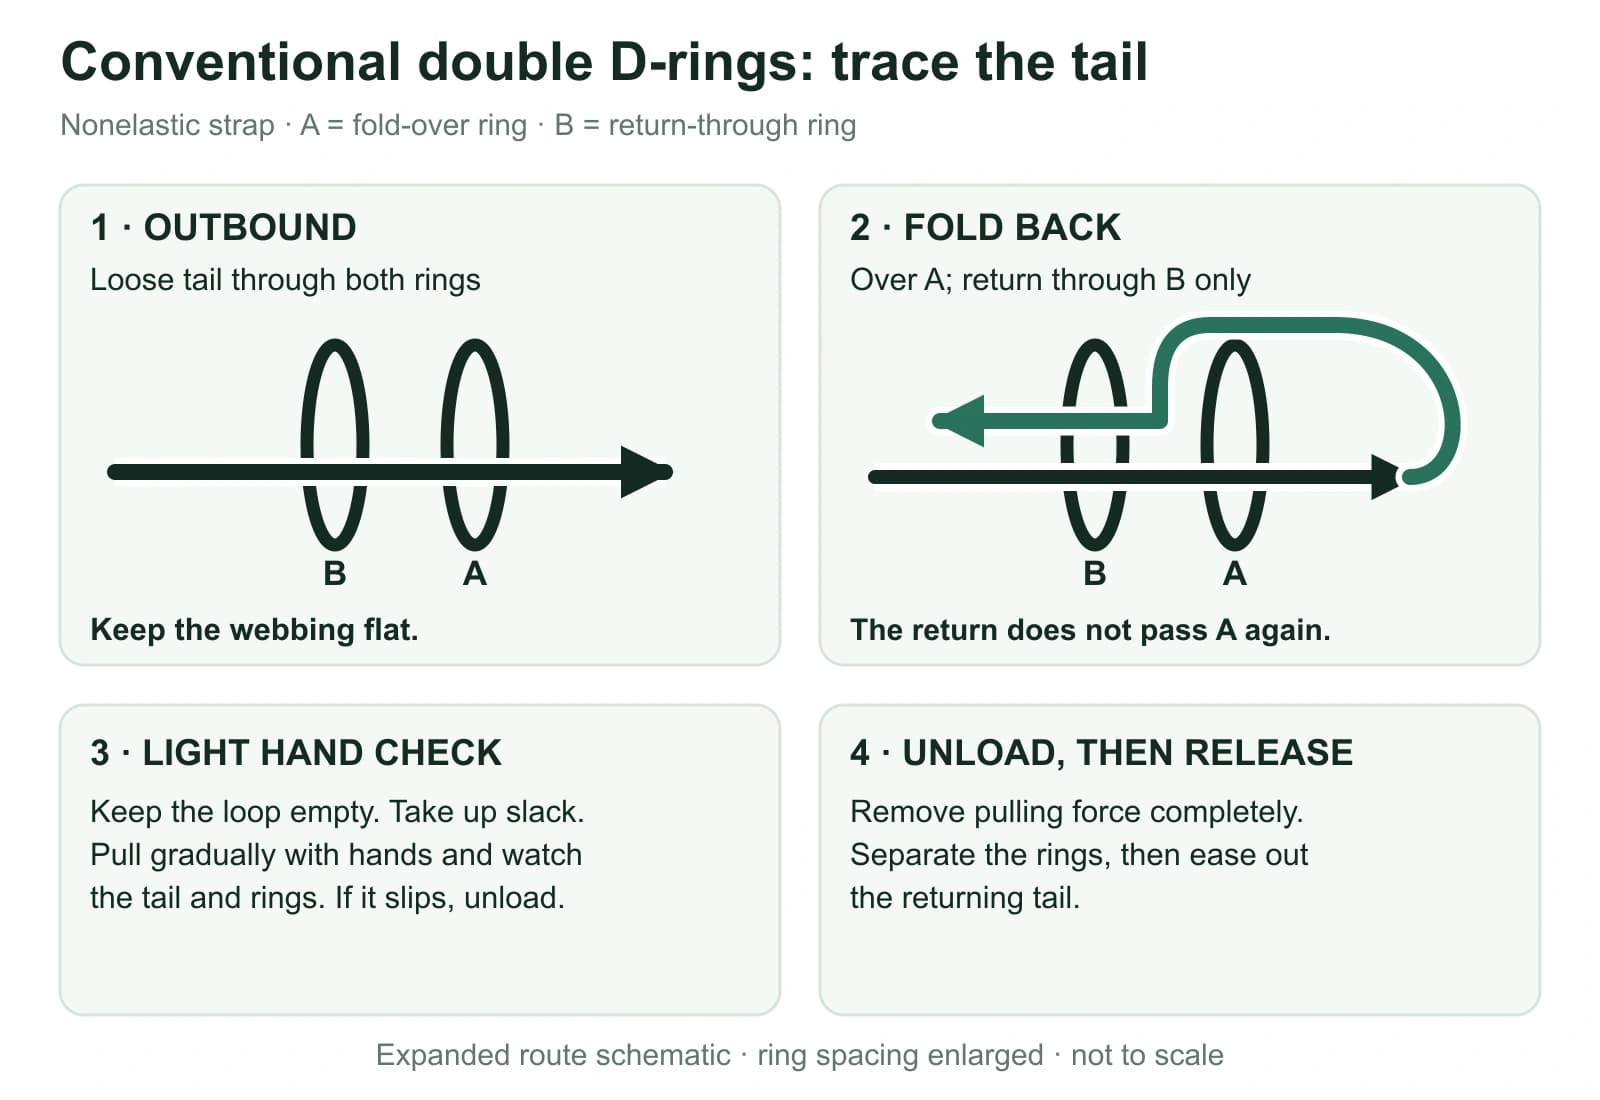
- Hold the two rings together in the same direction, with untwisted webbing.
- Bring the loose tail around to form a loop and feed it through both rings together.
- Separate the rings slightly. Fold the emerging tail back over the nearest ring, then return it through the other ring only.
- Keep the doubled webbing flat between the rings. Take up slack gently while leaving the required tail.
- Hold opposite sides of the main loop and apply a light gradual pull with your hands. Watch the tail and hardware for movement.
Passing through both rings once leaves out the return that creates friction. Returning through both again also misses the intended route. If the tail moves, unload and trace the path before trying again. If correctly routed clean webbing still slips, ask the maker rather than adding a knot, tape or more pulling force.
A successful light hand check is not a load rating. A yoga strap is not a climbing sling, suspension trainer or door anchor. Keep the hardware clear of the body contact area and size any instructed loop so it can be placed and removed comfortably.
Trace the route while the strap is on a table
| Stage | Loose-tail path | Unloaded check |
|---|---|---|
| 1: outward path | Through both matching D-rings together | Webbing flat; no limb inside the loop |
| 2: return path | Fold back over the nearer ring, then through the other ring only | Do not return through both rings |
| 3: check and release | Use a light gradual hand check; remove force completely before separating the rings and easing out the returning tail | Slipping means unload and inspect, not add a knot or more force |
Keep the printable first-use strap checklist beside the threading and release steps. Its sequence belongs to the same conventional D-ring scope.
How to use a stretching strap: practise the release
Lay the webbing flat, identify the intended foot contact and choose an accessible handhold. Avoid a thin twisted cord against the foot or a tight loop around individual toes. Do not wind the strap around your wrists to stop a slippery grip; you need the option to let tension go.
Before holding a stretch, rehearse making it easier. Let the hands move toward the foot, soften the raised knee if applicable and lower the limb into support. Only then resize or loosen the buckle. To undo a conventional D-ring loop, remove pulling force completely, separate the rings and ease the returning tail back through.
The Gaiam multi-grip strap care sheet emphasises inspection and secure grip for its own model. Follow your strap's equivalent directions. After use, clean and dry it as instructed, check the loops or buckle, and store a loose coil with hardware kept from scraping other equipment.
First yoga strap stretch: a supported hamstring position
Warm up with comfortable general movement before a held stretch. Mayo Clinic's stretching guidance advises against bouncing and stretching into pain. A moving warm-up, a held stretch and resistance training have different purposes; a stronger pull does not combine them into a better task.
The UCSF lower-body stretching sheet includes a supine hamstring stretch with a towel or strap. The following first handling attempt keeps the trunk supported and the range adjustable:
- Sit down and place the strap broadly around the forefoot as the product and exercise directions allow, keeping any hardware away from contact.
- Lie on your back and hold both sides evenly. Keep the other knee bent with its foot supported if comfortable.
- Bring the strapped thigh upward with a little knee bend, keeping the head and shoulders down.
- Slowly lengthen the raised leg only until you notice a gentle back-of-thigh stretch. You do not need a straight knee or a foot pointing at the ceiling.
- To finish, soften the knee and lower the leg before removing or adjusting the strap.
A brief comfortable attempt is enough to learn the equipment; do not copy a maximum range or hold time from a photograph. If the shoulders rise, lengthen the handhold. If the head lifts, lower the leg. If the strap twists or slips, return the foot to support and reset unloaded.
Sharp pain, burning, tingling, numbness or joint pinching calls for release and stopping, rather than more stretching to investigate it. If symptoms, a recent injury or a condition affect movement choice, get individual guidance. Use a different comfortable range on each side instead of forcing a visual match.
Light resistance bands for mobility: keep the movement in charge
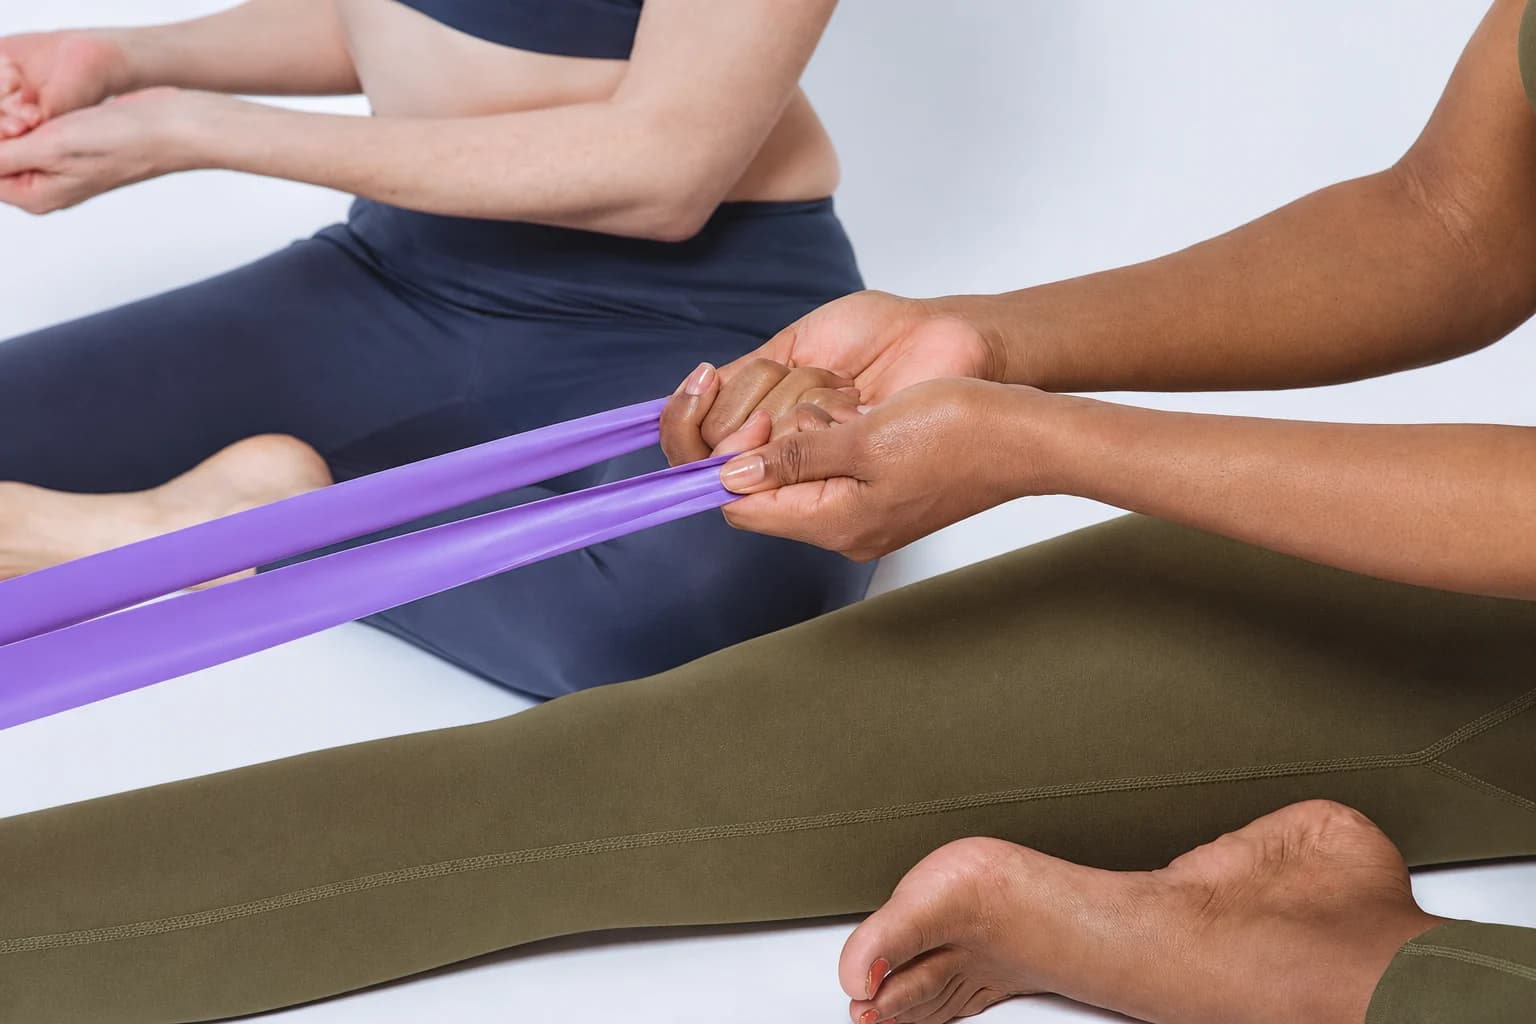
For resistance band stretches or mobility work, light means a force that lets you follow the same smooth path you can control without equipment. A band easy to use in a row may be too demanding overhead. No universal colour defines the right tension, and a nonelastic strap should not replace an elastic exercise instruction.
For shoulder mobility with a band, an editorial starting option is a wide two-hand grip with very little outward tension. Raise the hands in front toward a comfortable overhead reach, then lower slowly. Stop before the ribs flare, the back arches or the shoulder pinches. Keep the band in front of or above you; forcing it behind the head is a different task. Empty-handed reaches remain an option.
For a back-mobility goal, try a small unbanded upper-body turn on a stable non-wheeled chair, keeping the feet supported. For ankle mobility, hold the chair, lift one leg into a comfortable position and gently point the toes away and back. The NHS sitting-exercise examples provide those ordinary movement formats. Neither needs a band anchored around the spine or ankle to pull farther.
A shallow squat with a permitted light thigh loop or an unbanded hip hinge can also be a controlled warm-up choice. Start without resistance and keep the motion modest. Do not use door handles, furniture or a loop around a joint for improvised distraction. If the band recoils, makes you hold your breath or changes the path, reduce tension or remove it. For equipment formats, see the portable resistance band kit guide.
Use the strap for dance and yoga poses without chasing depth
For dance practice and named yoga poses, start with the setup taught for that task. Ask whether the prop should be held openly, made into a loop or replaced by another support. Its purpose is to bridge reach while you organise the position, not to create splits, oversplits or an overhead connection by force.
A photograph can show a grip but does not supply your suitable range. Check the entry, body contact and release with the teacher or exact exercise directions before copying a complex pose. Do not have a partner use the strap to pull you deeper. One well-controlled first stretch is a useful starting point; a full lower-body routine is a separate session choice.
Printable strap setup checklist
Download the original stretching-strap first-use checklist (PDF). The two-page sheet covers equipment checks, conventional D-ring routing, one supported first stretch and a practice record. Use this short checklist to organise first use. Record the model, closure or loop design, comfortable handhold and the first supported position that worked. The list is a handling reminder, not a flexibility test.
- The tool matches the task: nonelastic reach assistance or elastic resistance.
- Webbing, loops, stitching and hardware are sound; the material is clean and dry as directed.
- The working length permits a relaxed grip and any buckle tail required by the maker.
- A conventional D-ring route has been checked unloaded, or the actual closure's instructions have been followed.
- The limb can return to support and tension can be released before any adjustment.
- The first movement remains gentle, with normal breathing and no need to chase range.