Resistance Band Buying Guide: Types, Materials & Starting Strength
Compare band formats, fabric and latex, resistance labels, handles and fit before choosing a useful set for your routine.

To choose a resistance band, settle the format first, check the full material declaration, then compare usable resistance levels within the same product system. A long loop, a handled tube and a short hip loop can all provide resistance, but their fit and connections differ. A matching color or a large number on a set label does not make them interchangeable.
This resistance band buying guide brings those decisions together: band types, fabric versus latex, starting strength, rolling or pinching, handles and material claims. Choose for the movements and location you actually have. You do not need a bundle containing every possible format.
Identify the band format before comparing strength
| Format | How to recognize it | The buying decision |
|---|---|---|
| Handled tube | A tubular elastic section with fixed handles or specified clip-ended fittings | Check grip, connector compatibility, tube length and the permitted attachment system |
| Long continuous loop | A closed, usually flat loop with no free ends | Confirm circumference or laid-flat length, width, resistance options and intended use |
| Open flat sheet | A flat strip with two free ends | Check supplied length and the grip or attachment described in the instructions |
| Mini loop or hip loop | A shorter closed loop, smooth, woven or padded | Check resting dimensions, intended placement, contact surface and manageable resistance |
Tube bands and flat bands can sometimes serve a similar training goal, but a tutorial using one format does not authorize a substitute. Compare grip, attachment, working length and the surfaces contacting the elastic. A mini-loop instruction cannot be recreated by knotting a tube or doubling a long band around your legs.
For example, a tube measurement may include its clips and handles, while a loop listing may report circumference or the length laid flat. Those numbers describe different things. Find the measurement convention before deciding that a band will fit your intended setup. Do not solve a length mismatch by stretching farther than the maker permits.
When choosing between formats, keep the exercise instructions beside the product details. If they show a particular flat-band grip, use equipment and guidance that support it. If they require a fixed point, confirm that the product and location permit that arrangement. Small equipment still needs an appropriate training space.
Fabric vs latex resistance bands: compare the whole construction
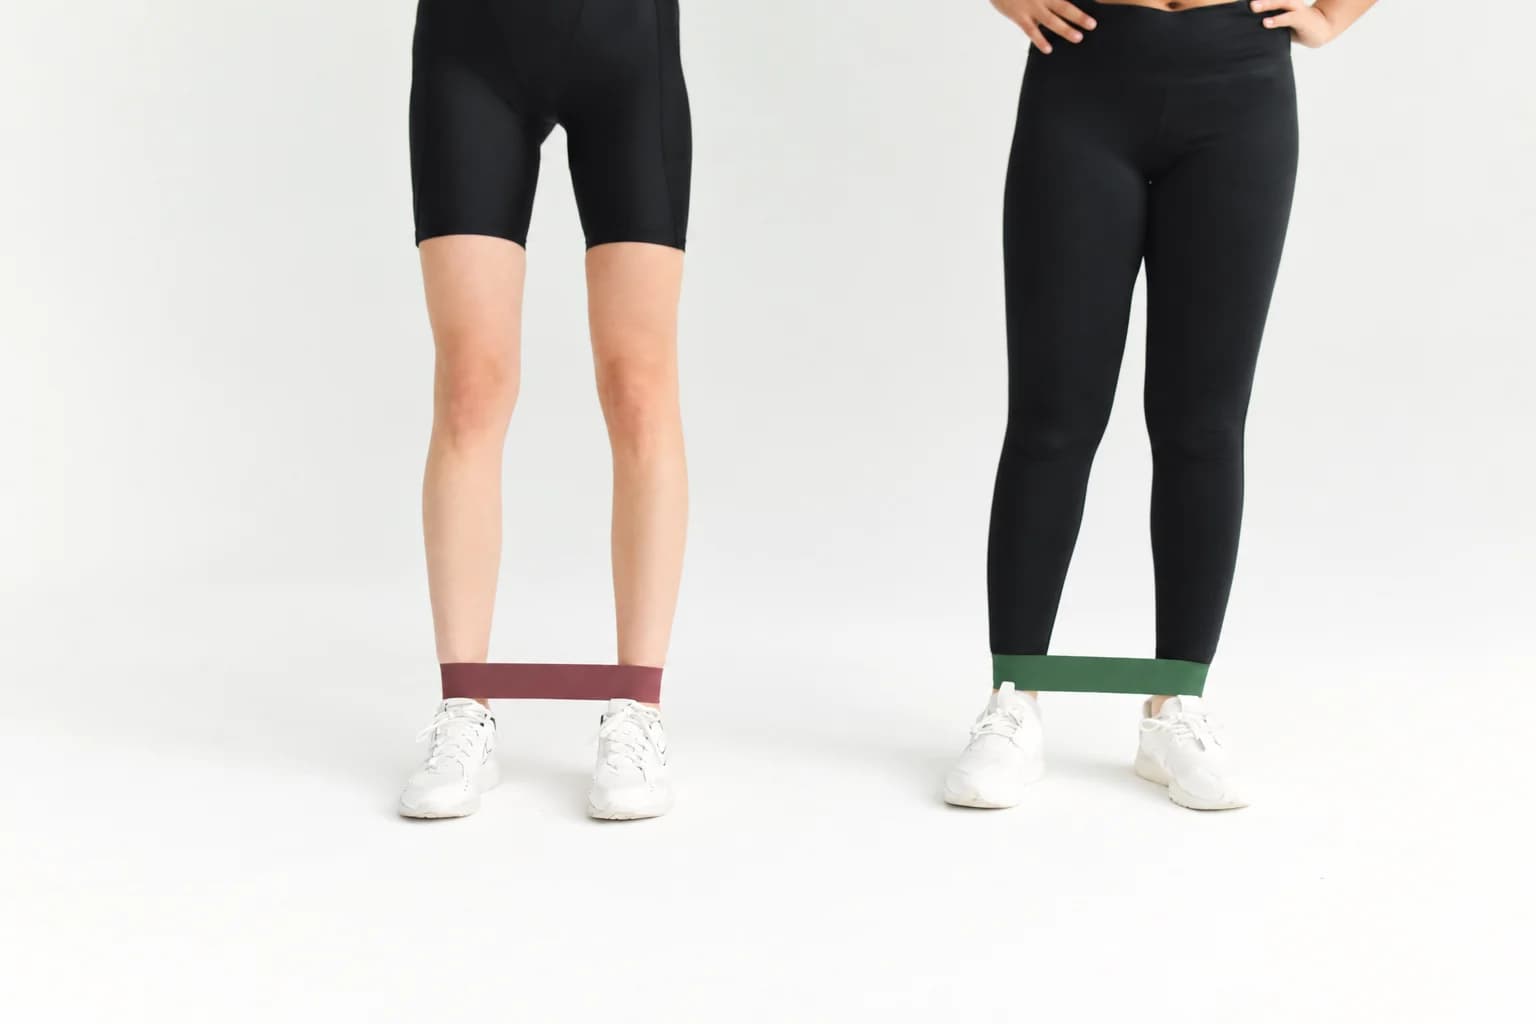
Fabric vs latex resistance bands is a useful comparison when you are choosing a short loop, provided you compare a similar size and intended placement. A smooth elastic strip, a woven sleeve and a padded hip loop feel and fit differently. “Fabric” describes a visible surface; it does not identify every material inside the band.
Compare loop width, seam position, edge finish, grip lining and resting dimensions. A wider textile surface may be worth considering if your current loop repeatedly bunches against clothing. It is not a guarantee against rolling, slipping or uncomfortable contact. A wide band also needs sufficient contact space and a suitable circumference for the intended placement.
Keep fit separate from resistance. A loop can be the wrong size even when its label says “light.” A more restrictive loop is not automatically a better training choice. Check whether the stated length means circumference or laid-flat length, and compare both products on the same basis.
Care is part of this comparison too. Check the cleaning and drying instructions for the whole assembly, including elastic, textile, seams and padding. A fabric covering does not establish that a band is machine washable or can go in a dryer. Avoid choosing a construction whose required care you cannot realistically manage between sessions.
Checking latex-free exercise resistance bands
When looking for latex-free exercise resistance bands, ask about the exact model, elastic core, covering, grip lining and other included components. Color, smell, a cloth sleeve or a broad “rubber” description is insufficient. A TPE material field identifies the listed material, but does not by itself verify the manufacturing and handling of the finished kit.
The American College of Allergy, Asthma and Immunology’s latex guidance distinguishes natural-rubber latex from synthetic rubber and advises people with latex allergy to avoid exposure and seek individual guidance. A fabric covering cannot make that decision for you. Do not use a covered product to work around a known material restriction.
For a useful terminology example, the FDA’s medical-product labeling guidance recommends a supported manufacturing statement—“not made with natural rubber latex”—rather than an unsupported assurance of complete absence. That document concerns medical products and is nonbinding guidance; it is not a blanket fitness-equipment labeling law. The practical buying lesson is to ask what the manufacturer can actually verify.
- Identify the exact model and selected option, rather than relying on the collection name.
- Request the full material information for the band and any accessories you will use.
- Where material avoidance matters, clarify the manufacturing statement and any information relevant to your individual requirements.
- Leave an unresolved answer unresolved. Do not convert “fabric,” “synthetic” or “covered” into an allergy-safety guarantee.
Colour coded resistance bands and pound labels
Colour coded resistance bands identify levels within an identified range. They are not a universal chart. If you want to know a red resistance band’s weight label, find the chart for that exact product and option. A red sheet, red tube and red hip loop need not deliver the same force.
Performance Health’s THERABAND support guidance explains that elastic force changes with elongation. Percent elongation measures the increase over resting length: a 50 cm section stretched to 75 cm has increased by 50%; reaching 100 cm would be 100% elongation. These arithmetic examples explain a measurement, not a recommended or permitted stretch for your band.
A resistance figure therefore needs conditions. Ask whether it describes one band, a particular stretch, a range or an approved combination. A label on a complete set does not establish the force at your hands, and adding all printed levels together does not establish a safe combined rating. Stay within the actual product’s limits.
| Listing information | Question to resolve |
|---|---|
| A color such as red | Which exact range and option does this chart describe? |
| A single value such as 20 lb | At what elongation and in what configuration was it defined? |
| A range of pound values | What stretch conditions correspond to the range? |
| A large set total | Is this a sum of labels, a permitted combination or something else? |
| A loop length | Is the measurement circumference, laid-flat length or usable elastic length? |
When replacing a familiar band, keep the product identity and setup consistent. A new band may feel different from an old one, but that sensation is not a calibrated measurement. Record the model and level instead of treating a remembered color as a complete specification.
How to choose resistance band strength for your movement
Start with the exercise instructions and the role the band plays. When it adds resistance, a stronger option increases the opposing force in the permitted setup. When a suitable band provides assistance, a stronger option can provide more help instead. The direction of the choice depends on the job; “heavier” is not always a progression.
Check format, fit and working length before judging the level. Then choose a manageable option that lets you follow the instructed movement with control and stay within the equipment’s permitted stretch. Do not chase a number while changing your position, shortening the band or altering its attachment beyond the guidance.
- If the movement is difficult but the setup fits, review the resistance option with appropriate instruction.
- If the band is restrictive or badly positioned before the movement starts, revisit the fit and format.
- If the elastic is slack where your instructions require tension, revisit the permitted setup and working length; an arbitrary knot or improvised anchor is not the answer.
Change one relevant variable at a time so you can tell what made the difference. A set is useful when its levels cover your actual movements, rather than because its maximum looks impressive. If your exercise selection or starting load is uncertain, a qualified instructor familiar with the activity can help you choose it.
A resistance band rolling up needs a fit check
Distinguish three problems. Rolling means an edge curls into a narrower strip. Sliding means a mostly flat loop moves from its intended position. Pinching means skin or clothing is caught or compressed uncomfortably. They can happen together, but the first event gives you the most useful thing to check.
- Unload the loop and get into a stable position before adjusting it.
- Check that the loop is untwisted and that its edges, seams and visible elastic are intact.
- Follow the intended placement and remove clothing folds or raised seams from the contact area where appropriate.
- Reassess size, width and construction if the issue persists. Stop a setup that causes pain, traps skin or will not remain secure.
Do not reach down to straighten a band while balancing in a loaded movement. Avoid oil, lotion, adhesive, rough padding or trimming an edge as an improvised fix. A stronger band is not an automatic solution, and a fabric loop is not guaranteed to stay flat. Compare a different documented fit or setup when the existing one keeps causing trouble.
What matters when choosing bands with handles
The best resistance bands with handles for one routine may be unsuitable for another. Compare the complete connection system: fixed versus detachable grips, the permitted band material or width, connector security, accessory compatibility and instructions. A similar-looking clip does not establish that two parts work together.
Purpose-made handles for flat bands use their own attachment design. Do not attach an arbitrary clip to a sheet or knot a tube to imitate a handle. Confirm whether multiple bands may share a grip and whether any total shown on the listing refers to that approved arrangement.
The best resistance band accessories are the ones your session actually needs and your system permits. A door anchor is useful only when the door, placement, closure and access control meet the maker’s requirements. Include the possibility of somebody opening the door from the other side. If you cannot verify that setup, use a different location or an appropriate session without that anchor.
Before ordering, check how to identify compatible replacement parts, inspect wear and find setup instructions. Piece count is a poor substitute for this information. For a used or unidentified kit, a tidy carrying bag cannot establish the condition or identity of every component.
Three PBGGAME examples show why format matters
These current catalog examples have different constructions. They are not a ranking, a universal starter bundle or equipment we claim to have tested together. Check the selected option’s current details and instructions before buying.
- The TPE long-loop set contains four or five continuous loops, depending on the option, and a door anchor. Its listed circumference is approximately 208 cm. Choose this format for exercises taught with long loops, and check the anchor and door requirements before use. The linked example is the four-loop option; choose the five-loop configuration for the separate five-loop selection.
- The padded hip resistance-loop set provides three short hip loops with padded contact areas. The listed materials include latex, canvas and NBR foam. Use the 20/40/60 lb markings to identify the options, then choose resistance and placement through the exercise and product instructions. This set contains latex.
- The waist-belt covered-tube set provides covered tubes, foam grips and wearable straps in the selected 12-piece system. Natural latex is listed for the tubes. Choose it for instruction that supports this waist-belt arrangement, including its specific connections and fit.
The useful comparison is not which box has the most pieces. It is which documented format, dimensions, material information and usable levels match your intended training. If you still cannot answer one of those questions, resolve it before treating a product as a suitable substitute.
Finish with a shortlist you can explain
- Format: matches the exercise instructions without an improvised connection.
- Fit and length: stated measurements make sense for the intended placement and setup.
- Materials: the whole assembly meets your requirements, with unknowns clearly identified.
- Resistance: individual levels and label conditions are understandable.
- Ownership: instructions, compatible replacement parts and care requirements are available.
Browse the resistance band collection with that shortlist in mind. For the complete bag, including mats and personal essentials, use our compact equipment and packing guide. A small, coherent setup is easier to choose when each item has a specific job.