Lifting Straps, Grips and Wrist Wraps: A Practical Buying Guide
Choose lifting straps, palm grips or wrist wraps by their job, release needs and fit. Compare strap structures, handle clearance, wrap length and stiffness.
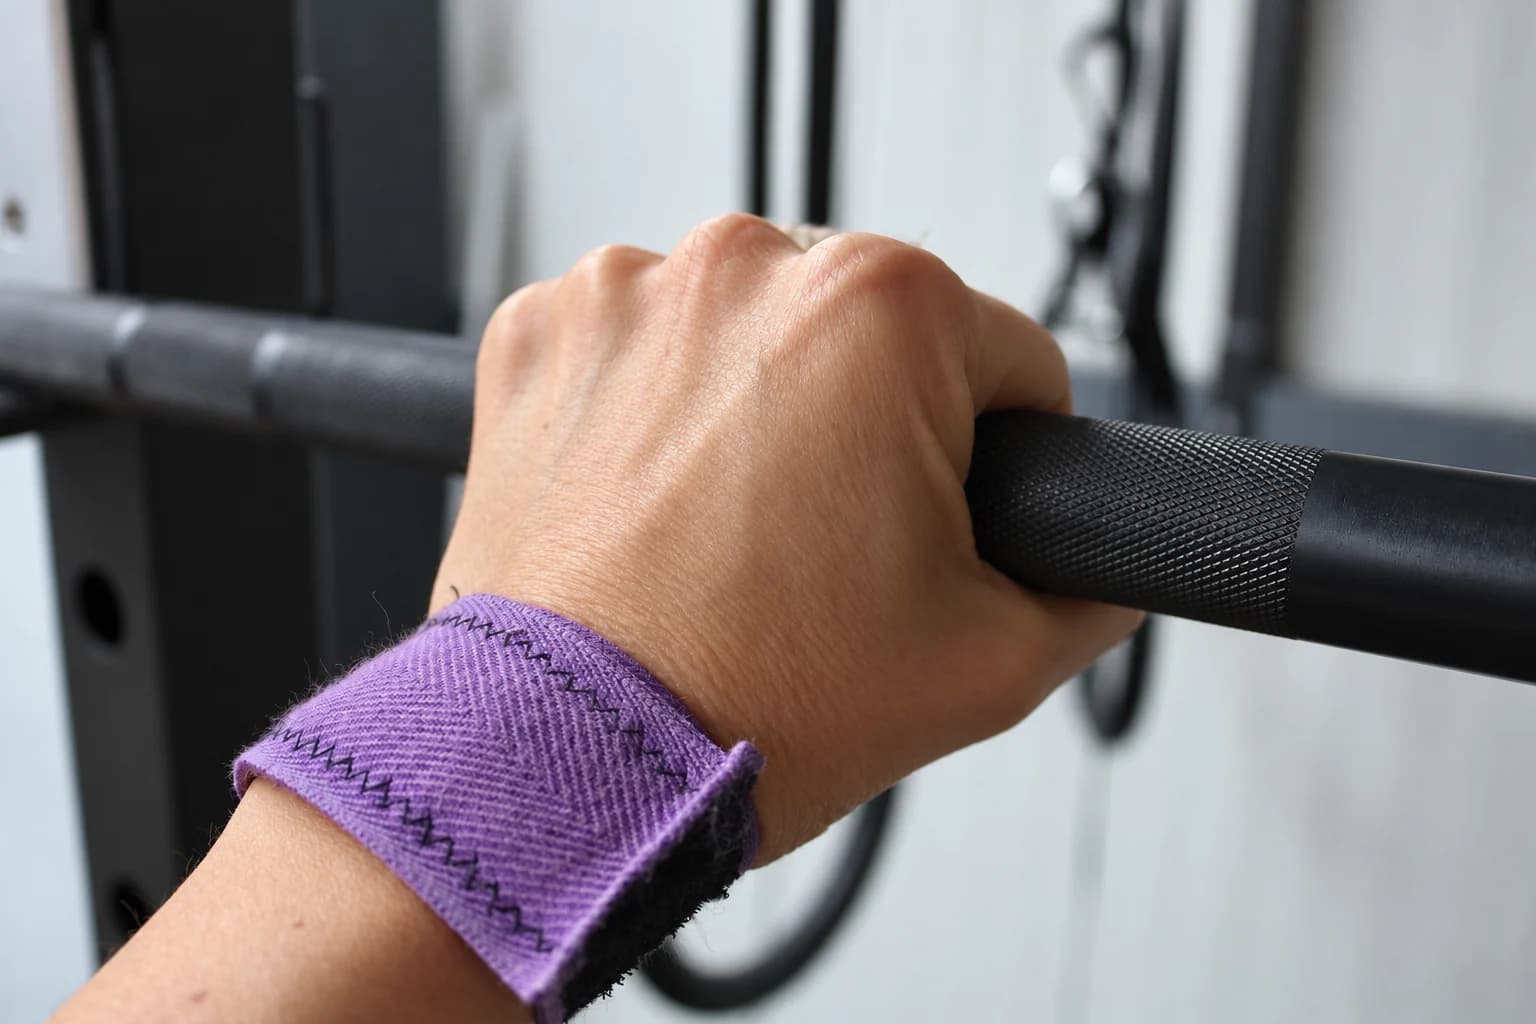
Choose a lifting accessory by the job it must do. Straps and palm-flap grips help connect your hand to a pulling implement. Wrist wraps add material around the wrist while your hand still grips the bar normally. Similar names on a listing do not make those jobs interchangeable.
Before comparing brands, describe the exercise, the handle and how you will finish the set. Then check the structure, exact sizing method, hand clearance and care requirements. This guide brings those decisions together so you can choose an appropriate format, including the option of using no accessory.
Lifting straps vs wrist wraps: follow the material
A lasso strap has a free tail that goes around a bar or handle. A figure 8 strap uses connected sewn loops. A cuff-style lifting grip has a palm flap that folds around the handle. These are forms of pulling assistance. A conventional strength wrist wrap stays around the wrist joint and does not create that same connection to the implement.
| Your question | Accessory to investigate | Important check |
|---|---|---|
| My fingers open during a familiar controlled pull. | A compatible lifting strap or palm-flap grip. | The complete grip, return and removal must fit the exercise. |
| I want a supported wrist feel in a familiar press. | A properly fitted strength wrist wrap. | Normal hand closure and the intended wrist position must remain possible. |
| The movement needs rapid separation from the bar. | Movement-specific instruction and an appropriate design. | Do not infer quick release from a deadlift photo or an Olympic label. |
| I cannot control the load or the equipment is damaged. | Reassess the load, technique or equipment first. | An accessory does not correct those problems. |
The Gymreapers straps-and-wraps explanation separates grip assistance from wrist support. Look at the actual construction as well as the label. A small thumb loop on a wrist wrap helps position fabric; it is not the long tail of a lifting strap and does not go around the bar for pulling assistance.
What are lifting straps for, and are they worth it?
Straps may be useful for a selected pulling set when your fingers are the part that ends it before the intended movement is complete. They do not make the load lighter or perform the movement. If your hold is secure but your position changes and you cannot return the weight under control, holding on longer does not solve the problem.
For example, fingers starting to open during a controlled row is a different observation from rocking the torso to finish it. During a deadlift, you still need to establish the start after fastening both hands and return the bar deliberately. Identify what ended the set before deciding that straps are the missing item.
There is no universal weight, body-weight ratio or training anniversary at which straps become necessary. They may suit one exercise and add little to another. If unsupported grip is a training goal, keep suitable unassisted practice visible in the plan. Record assisted sets clearly so a change of accessory is not mistaken for a change in load alone.
How to choose lifting straps: structure and exit first
A lasso strap forms an adjustable wrist loop and leaves a tail to wrap around the implement. Its useful adjustment depends on the actual loop, padding and available tail. Check that the material can lie flat at your normal grip width, and that you can set the second hand without losing your exercise position. More unused tail is not automatically an advantage.
A figure 8 strap has two connected sewn loops rather than a long free tail. Its fit depends on the chosen size and bar. It can keep the hand connected after the fingers open, so plan to support the load fully before removing it. Do not choose this structure for a task that requires a quick separation from the implement.
A short-loop strap uses a fixed loop with less material to manage around the bar. Its handling and release depend on the exact model and method. The REP lifting-strap guide distinguishes strap structures and their uses. Learn the actual model before assuming that experience with a lasso transfers to a short loop.
For Olympic-style training, the end of the movement and possible need to separate rapidly from the bar are central to the choice. Gymreapers' discussion of Olympic-style straps treats that release requirement separately from ordinary pulling assistance. Seek instruction for the lift and accessory. A product name, a claim of fast release or a successful floor pull does not establish suitability for a dynamic lift. Do not choose a figure 8 for that purpose.
Figure 8 lifting straps sizing: wrist and bar together
Use the exact model's chart before taking a measurement. A centimetre label on a sewn loop is not automatically a wrist circumference, and small or medium does not transfer between brands. The material has to accommodate both the wrist-and-hand route and the implement. A thicker bar changes that route.
Manufacturer examples use different methods. Gymreapers' figure 8 chart describes wrist circumference at the wrist bone. Serious Steel also uses a wrist measurement and distinguishes an axle option. SBD describes a hand measurement combined with half the wrist width, with additional guidance for an axle. These are examples of why charts differ, not a cross-brand conversion or a PBGGAME size chart.
Follow the current Serious Steel figure 8 instructions and SBD figure 8 measurement diagram only for those respective products. For a circumference method, keep a flexible tape flat at the stated location without deliberately squeezing it. If you use non-stretch string, mark the overlap before laying it against a ruler. Do not add an arbitrary fit allowance.
Record the bar type beside the measurement. If you alternate a normal bar and an axle, ask whether one size is intended for both. On a supported unloaded implement, check the instructed route, normal hand closure and gentle take-up of slack. Pinching or excessive travel can reflect routing as well as size. Do not cut, knot or restitch sewn loops to force a fit.
Lifting grips vs straps: check cuff, palm pad and handle
Here, lifting grips means pulling aids with a wrist cuff and palm flap. Loose palm pads, gloves, finger-hole gymnastics grips and squeeze-style hand exercisers are different products. Compared with a lasso tail, the flap presents a different amount and shape of material around the handle. Neither format is universally faster or more secure.
Check wrist fit and pad reach independently. A cuff must fasten within the maker's intended adjustment range. Buying a larger size for a longer flap may simply create a loose cuff if only the wrist band changes between sizes. The Versa Gripps FAQ illustrates why wrist sizing and the palm arrangement need separate questions. Its guidance belongs to its own range.
Then examine your handles. A straight pulldown bar can offer more room than a narrow row attachment. A thick handle requires more flap reach; a small dumbbell handle may leave little space between the heads. Check whether the pad can fold as instructed while every finger closes normally, without a ridge beneath the hand or material crowded against a central join.
Do the same check for a lasso tail: usable room and the intended material path matter more than a universal-fit label. Do not route either aid around a cable or moving joint instead of its handgrip. If you cannot reach and return a machine handle without being pulled out of position, change the configuration or leave the accessory out.
The PBGGAME contoured rubber lifting grips in Black / SM illustrate the cuff-and-pad format. The listing gives SM a 4-inch palm length and L a 4.4-inch palm length, so another size changes the pad specification too. Check this model's cuff guidance and the intended handle rather than transferring Versa's sizing arrangement. Those dimensions alone do not establish a wrist-to-size chart or compatibility with every handle.
Sizing information still needed for the selected grip
| Black / SM PBG-745346 | What the listing detail establishes | What still needs the actual model’s chart |
|---|---|---|
| Palm length | SM is listed as 4 inches; L is separately listed as 4.4 inches | Measurement endpoints and a usable pad-reach diagram |
| Wrist cuff | The format has a padded cuff and closure | Where to measure, allowable wrist range and closure overlap |
| Handle fit | The handle and fold are part of the decision | Permitted handle dimensions and demonstrated release for this model |
Request those details via contact, quoting the exact SKU and intended handle. Do not choose SM or L by Versa’s wrist rule or assume only the wrist band changes. After selection, keep the separate lessons for fitting, using and removing lifting straps and fitting wrist wraps before a press.
What are wrist wraps for? Support with a normal grip
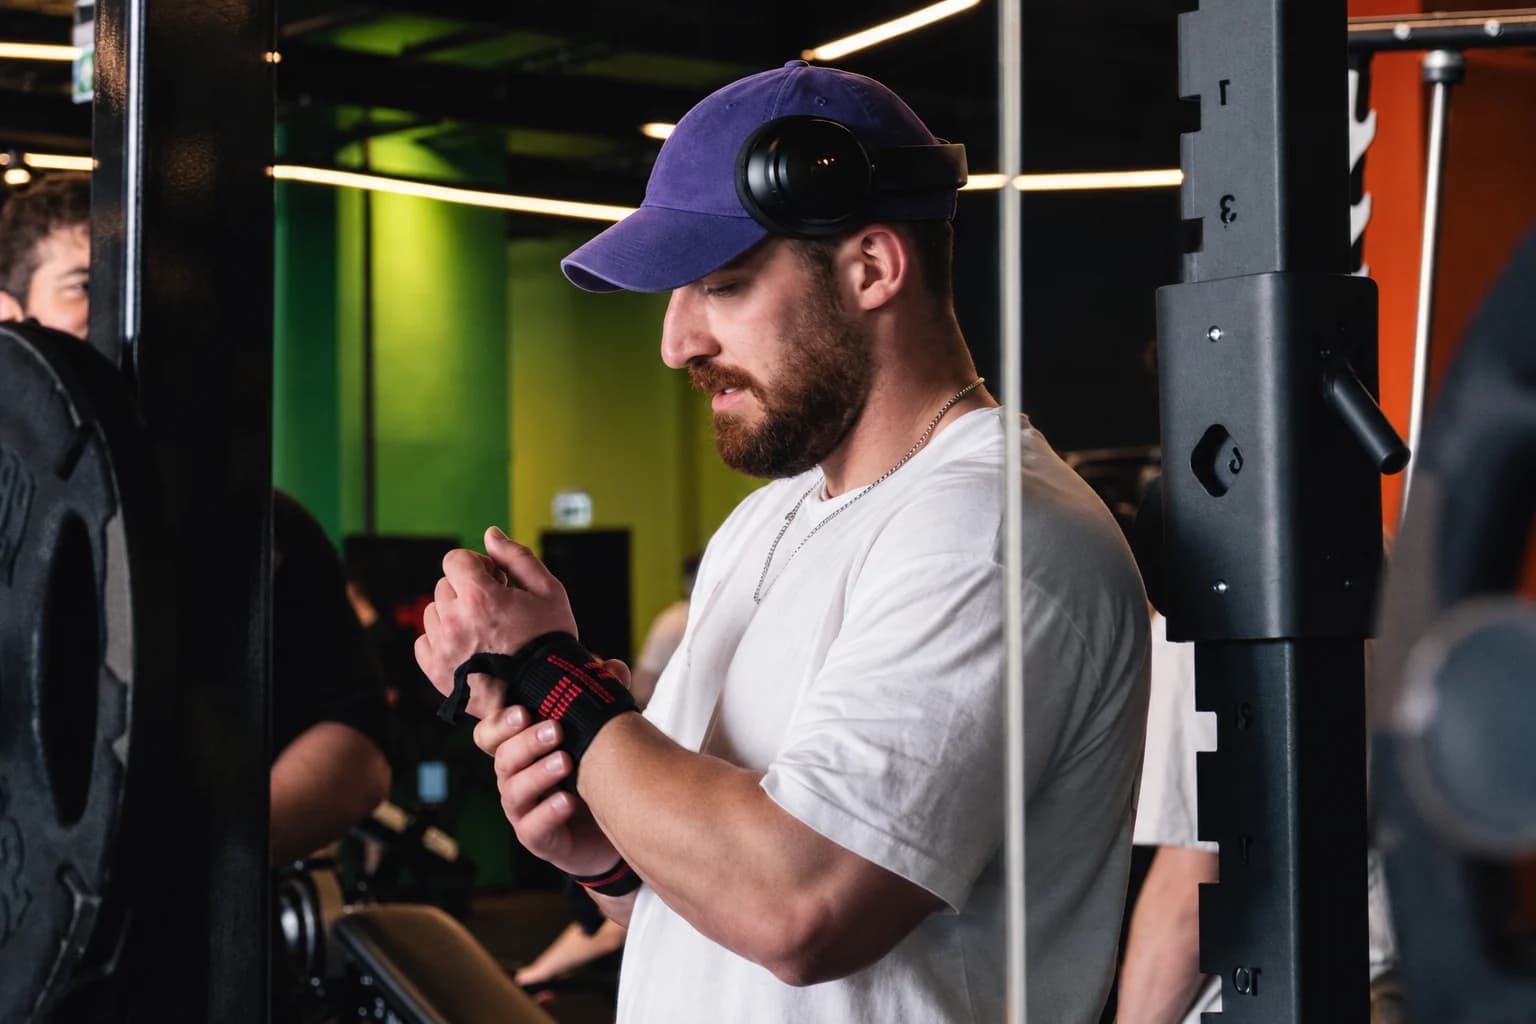
Wrist wraps add external support around the wrist and can limit movement to different degrees. Material, width, length, placement and tension all affect the feel. They are optional for selected sets, commonly in familiar pressing exercises. They do not replace normal hand closure, an appropriate load or the rack and safety arrangements that the exercise requires.
Try the intended hand position before deciding that more restriction is useful. A pair comfortable with the hand open may crowd the base of the thumb when you close around a bar. A wrap positioned entirely below the joint like a bracelet may also behave differently from the maker's intended fit. Follow its placement and closure instructions rather than copying an arbitrary number of turns.
Use an unloaded bar or supported handle to check whether the fastening stays clear of the palm, the layers lie flat and your usual grip remains possible. Repeat on both wrists. If one side feels different, reset the orientation and fabric before deciding that it needs more tension. Do not change the exercise into an awkward hand position to accommodate the wrap.
Wear wraps for the sets where they have a purpose and loosen or remove them after the equipment is securely returned. More compression is not a test of effective support. Remove it if it causes discomfort or prevents your normal grip; do not keep tightening it to force a supported feeling. A supported feeling does not prove injury prevention or readiness for a heavier lift.
60 cm or 90 cm wrist wraps? Compare the same construction
These numbers describe unfolded wrap length, not wrist-circumference sizes. Sixty centimetres is approximately 23.6 inches; ninety is approximately 35.4 inches. Confirm how the exact manufacturer measures the product, including any section needed for fastening. Do not infer its length from a photograph or thumb loop.
Within the same material, width and construction, the extra 30 cm offers more overlap and more fabric to manage. It can also add bulk. The Gymreapers length guide discusses that handling tradeoff separately from stiffness. Wrist circumference, stretch, the wrapping path and closure position determine the usable result. Dividing advertised length by wrist circumference cannot give a reliable exact turn count: each new layer changes the outside circumference.
Consider the shorter option when it already gives the intended fit and a manageable setup. Consider more length when you want additional overlap and can still close the hand normally. Neither choice belongs automatically to a certain lifting total. Compare length separately from stiffness, rather than attributing every difference between two unrelated pairs to the extra fabric.
Stiff vs flexible wrist wraps: feel is model-specific
Stiff and flexible describe intended material feel and movement allowance, not a shared laboratory score. SBD's wrist-wrap range separates constructions with different movement intentions. That is information about those models, rather than a universal rating for every product using the same words.
Flexible wrist wraps may be easier to shape around a contour and allow more give; stiff constructions may feel more restrictive and need more deliberate positioning. Both still require a suitable closure and normal grip. Neither a fibre name, an apparent thickness nor a pro label in a photograph measures the finished product's stiffness.
For a useful comparison, hold length and width reasonably similar within a product family. Fit each as directed rather than forcing a less stretchy material to match another wrap's elongation. Check edges, gaps and bunching in the actual hand position, then use an easy familiar set if the unloaded fit is suitable. You are assessing handling, not testing a new maximum.
Make a purchase note before comparing colours
- Task: write the exercise, the reason for assistance or support, and how the implement comes to rest.
- Fit: record the manufacturer, model, measurement location, units and chosen size or length.
- Interface: note the actual bar diameter or handle space and whether the normal grip remains possible.
- Handling: confirm that you can fit both sides, take up slack where required, return the load and remove the accessory.
- Care: check cleaning, drying, inspection and replacement instructions, plus competition requirements if relevant.
Compare material after the structure suits the task. Cotton, nylon, leather and composites are broad families; weave, thickness, finish, seams and closure change the finished accessory. A material name is not a load rating. Check for fraying, damaged stitching or a failing fastening, and follow the maker's care method rather than assuming every pair can be soaked or machine washed.
If you compete, check your event's current rules and exact approved-equipment requirements before buying. A general competition reference or a matching advertised dimension is not enough to establish eligibility. This guide does not substitute one federation's rules for another event's requirements.
Finish the first trial with the equipment supported
Before working load, rehearse the model's fitting, ordinary grip, supported return and removal on an unloaded or very light implement. Include the second hand. For a pulling aid, opening the fingers alone is not proof of immediate disengagement. Do not test release by dropping a loaded bar or hanging your body from a new pair.
If something slips, bunches or catches, put the implement fully down before adjusting it. Return to the instructions or choose another suitable design. Record the accessory and what changed in the set: hold, movement control, setup or comfort. Keep it only when it solves the task you identified and you can repeat the whole arrangement.