Home Slider Workout: Core and Leg Exercises You Can Control
Choose a compatible floor, learn six slider movement patterns and build an adjustable home session, with surface troubleshooting and simpler alternatives.
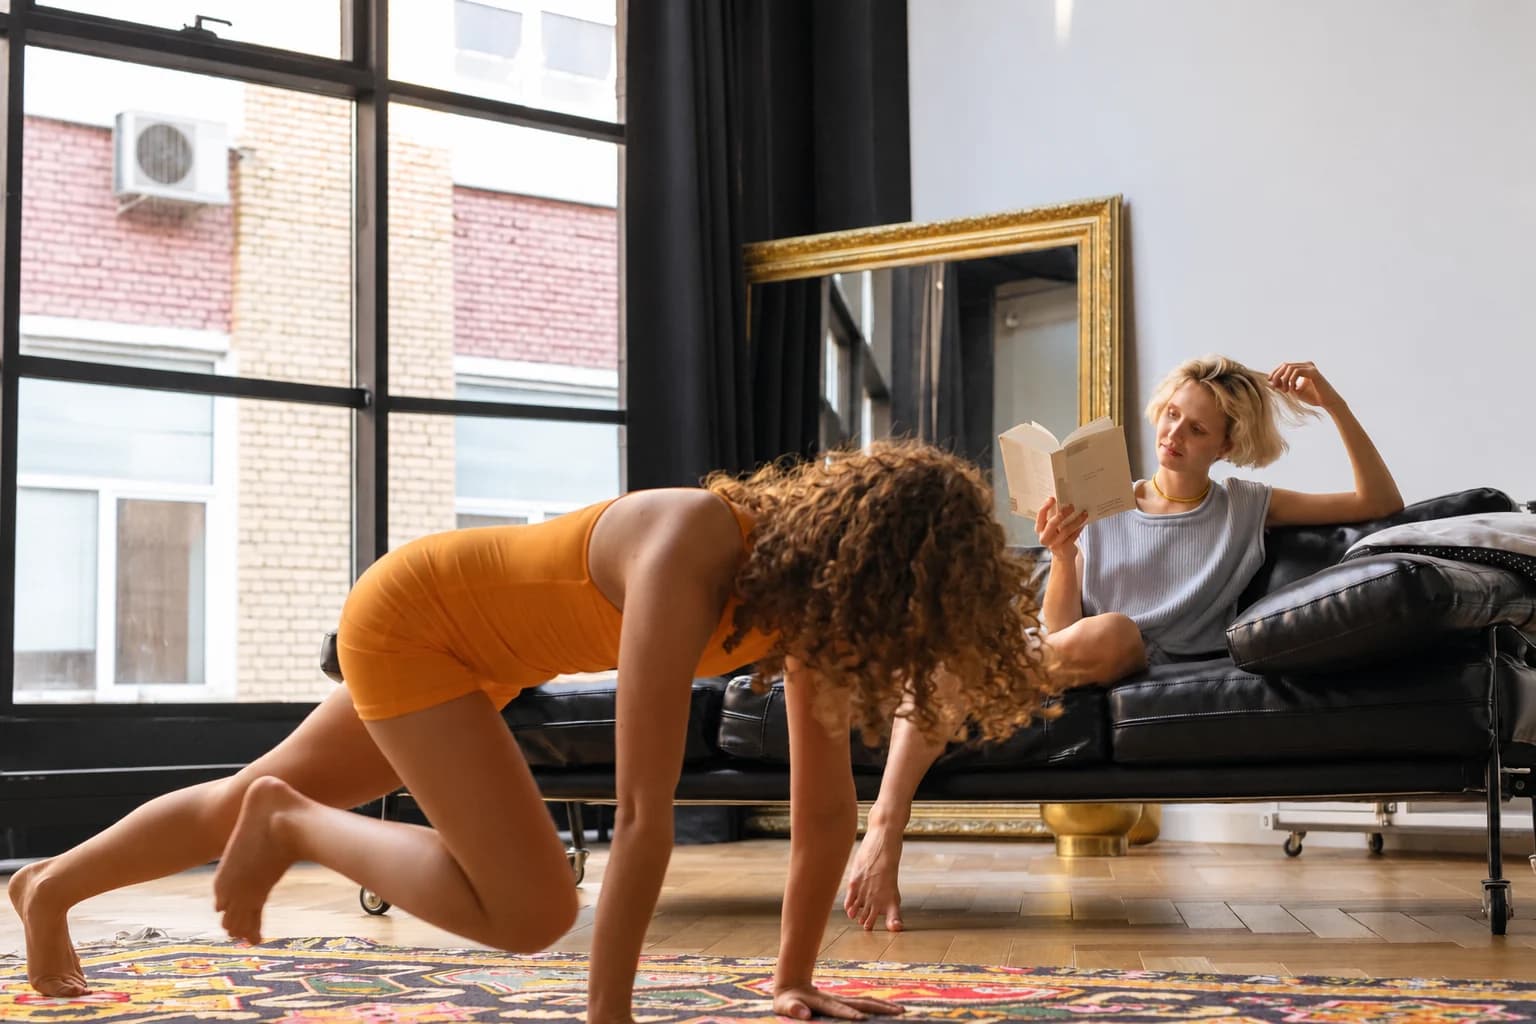
Build a home slider workout around movements you can stop and bring back under control. Begin with a compatible floor and disc pairing, one supported standing exercise and a simple heel-slide rehearsal. Add moving-plank exercises only when their stationary positions already feel comfortable.
Sliders keep a hand or foot in moving contact with the floor. That changes familiar lunges, knee movements and planks without adding a dumbbell, but it also makes the surface part of the exercise. Learn the return and exit before increasing travel, speed or repetitions. You can use the six movement options below without doing all six in one session.
Choose a position before choosing a slider exercise
| Comfortable starting support | Movement menu | Simpler entry | Exit to read first |
|---|---|---|---|
| Standing with fixed support | Reverse slide or side slide | Short travel or a non-sliding split squat / side lunge | Bring the disc home; step off before changing sides |
| Lying on the back | Heel slide and curl | Keep hips resting and move one heel | Bring heels back; deliberately rest the hips |
| Comfortable high plank | Single knee slide; paired knee tuck is a separate choice | Stationary or knee-supported plank | Lower knees before repositioning the discs |
| Comfortable forearm plank | Small body-saw glide | Stationary forearm plank | Return to the original position, then lower knees |
For a first combination, use the standing / heel-slide / optional stationary-plank example. Select the positions you already control; the six movements are a menu rather than a compulsory circuit.
Exercise sliders for carpet and hard floors: check the pairing
Read the instructions for your exact discs and flooring first. Many dual-sided models use a rigid smooth face on carpet and a softer fabric face on hard flooring. That is a common arrangement, not a rule for every product: a padded face may instead be intended to contact the shoe, and some discs have covers or only one permitted surface.
The Gaiam Core Sliding Discs page describes different materials for carpet and hard-floor use on its model. Check both contacts on your own equipment: the underside should move predictably while the upper face keeps the foot or hand securely placed. More glide underneath cannot correct a foot slipping off the top.
| Your surface | Check before loading | Reason to change the setup |
|---|---|---|
| Carpet | Approved face, level disc and a short manageable glide. | Pile grips the rim, the disc tilts or the carpet bunches. |
| Wood or laminate | Floor-care permission, clean contact face and unchanged finish. | Marks, grit, raised seams or finish restrictions. |
| Tile | A dry, level route with no catching joints. | The rim drops into grout or meets a raised edge. |
| Rubber flooring, a rug or mat | Explicit compatibility and a stable surface. | Drag, shifting layers or an interrupted return. |
When using exercise sliders on carpet, test the actual pile and complete travel path. A short firm carpet and a loose thick rug may behave differently. For sliding discs on hardwood, a soft contact face still needs to be clean: trapped grit can affect the finish. Follow the floor's care instructions when choosing and testing a contact face.
- Clear the outward and return lanes, including space to step off or lower the knees. Keep cables, loose objects and furniture away.
- Following the equipment and floor directions, move a disc by hand over a small inconspicuous patch with light pressure. Check for marks, snagging or a separating layer.
- With reliable support, try a short, lightly loaded foot slide. Confirm that you can start, stop and return without a shove or jerk.
This is a practical compatibility check, not a guarantee against floor damage. Stop if the surface marks or the disc catches. Keep stationary support separate from the moving lane: a stable mat may cushion hands, forearms or the resting body while the sliders remain beyond its edge. Do not cross from floor to mat or rug during a loaded repetition.
Check the pack size as well as the discs
The PBGGAME 20-disc core-slider set is one equipment example. The selected pack contains twenty discs, rather than a single pair. The movements here use one or two sliding contacts, so consider whether a larger set fits shared use before choosing it. Confirm the model's side-to-floor directions and your floor's care requirements rather than borrowing another brand's instructions.
Exercise sliders not sliding, sticking or slipping
Stop and unload before investigating a changed glide. Note whether one disc or both changed, whether the problem occurs under light hand pressure and whether it follows a particular floor location. Those observations help separate equipment, surface and movement issues without repeating a difficult loaded exercise.
| What you notice | First check | Useful response |
|---|---|---|
| Sliders sticking on the floor throughout the lane | Approved underside, surface and cleanliness. | Use another approved setup if drag remains. |
| One disc catches wherever it goes | Its rim, shell and contact layer. | Take damaged equipment out of use. |
| Both catch in the same place | A seam, grout joint, grit or mat edge. | Move the complete lane away from the obstacle. |
| The foot slips while the disc stays still | Upper contact, moisture and placement. | Unload and restore secure contact. |
| Sliders are too slippery during exercise | Moisture or residue, then range and speed. | Resolve the surface issue; otherwise simplify the movement. |
Do not add oil, polish, spray, water or powder to create glide. Do not sand, heat or tape a disc into a different design. If a clean, dry, approved setup moves predictably under light pressure but escapes under you, shorten the exercise and use more stable support. If you still cannot stop it deliberately, choose a non-sliding version.
The Gaiam care and safety guide calls for a flat clear area, secure hand or foot placement and controlled movement. Inspect for cracks, sharp edges, loose pads and changed shape. Clean and store your model as instructed, and put the discs away after use so they are not left on a walkway.
Slider reverse lunge: keep the front foot planted
A reverse lunge with sliders uses one stable front foot and one moving rear forefoot. Start only as low as an ordinary comfortable split stance allows. A sturdy fixed counter can provide light balance assistance; a rolling chair or movable table cannot provide a dependable reference.
- Stand about hip-width apart with the rear forefoot centred on one disc as its instructions permit. Keep the front foot on stable floor.
- Keep most of the load through the front foot. Let the rear disc travel backward a short distance as the front knee bends and the hips lower slightly.
- Allow a comfortable small forward torso inclination. Keep the front heel grounded and the knee moving generally in the direction of the toes.
- Stop while you can pause, then press through the planted foot and guide the rear disc back as you rise. Step off deliberately before changing sides.
Learn that quiet return before reaching farther. The rear knee may bend and its heel may rise; do not launch the disc away or lock the rear leg to force a stretch. Knee travel varies with stance and body proportions, so use comfortable whole-foot contact instead of a universal rule that the front knee cannot move forward. If you pull hard on the support or need momentum to return, reduce the slide or use the ordinary split squat.
Slider lateral lunge: send one foot sideways
A side lunge with sliders changes the direction. If the right foot slides out, the left foot stays planted and the left knee bends. Keep the working foot grounded while the hips move back slightly; the moving leg becomes longer without an aggressive knee lock.
The Gaiam exercise guide shows the side-lunge pattern of one leg moving outward while the opposite knee bends. The short supported version here is a learning option. Check a clear sideways lane and keep the fixed support outside it before starting.
- Begin around hip-width apart, one foot on stable floor and the other centred on its disc.
- Bend the planted knee, hinge modestly at that hip and guide the disc a short distance sideways.
- Pause before the planted heel lifts, the foot rolls onto an edge or the torso turns toward the moving leg.
- Rise through the planted leg and bring the disc back to the starting stance. Reset the support before changing sides.
Keep the outward slide small enough that you can bring it home smoothly. A deeper split is not the goal. If the planted knee repeatedly moves inward or the chest collapses toward the thigh, reduce travel and bend less. A catching disc needs an equipment check, rather than more effort.
Slider hamstring curl: rehearse the heel slide first
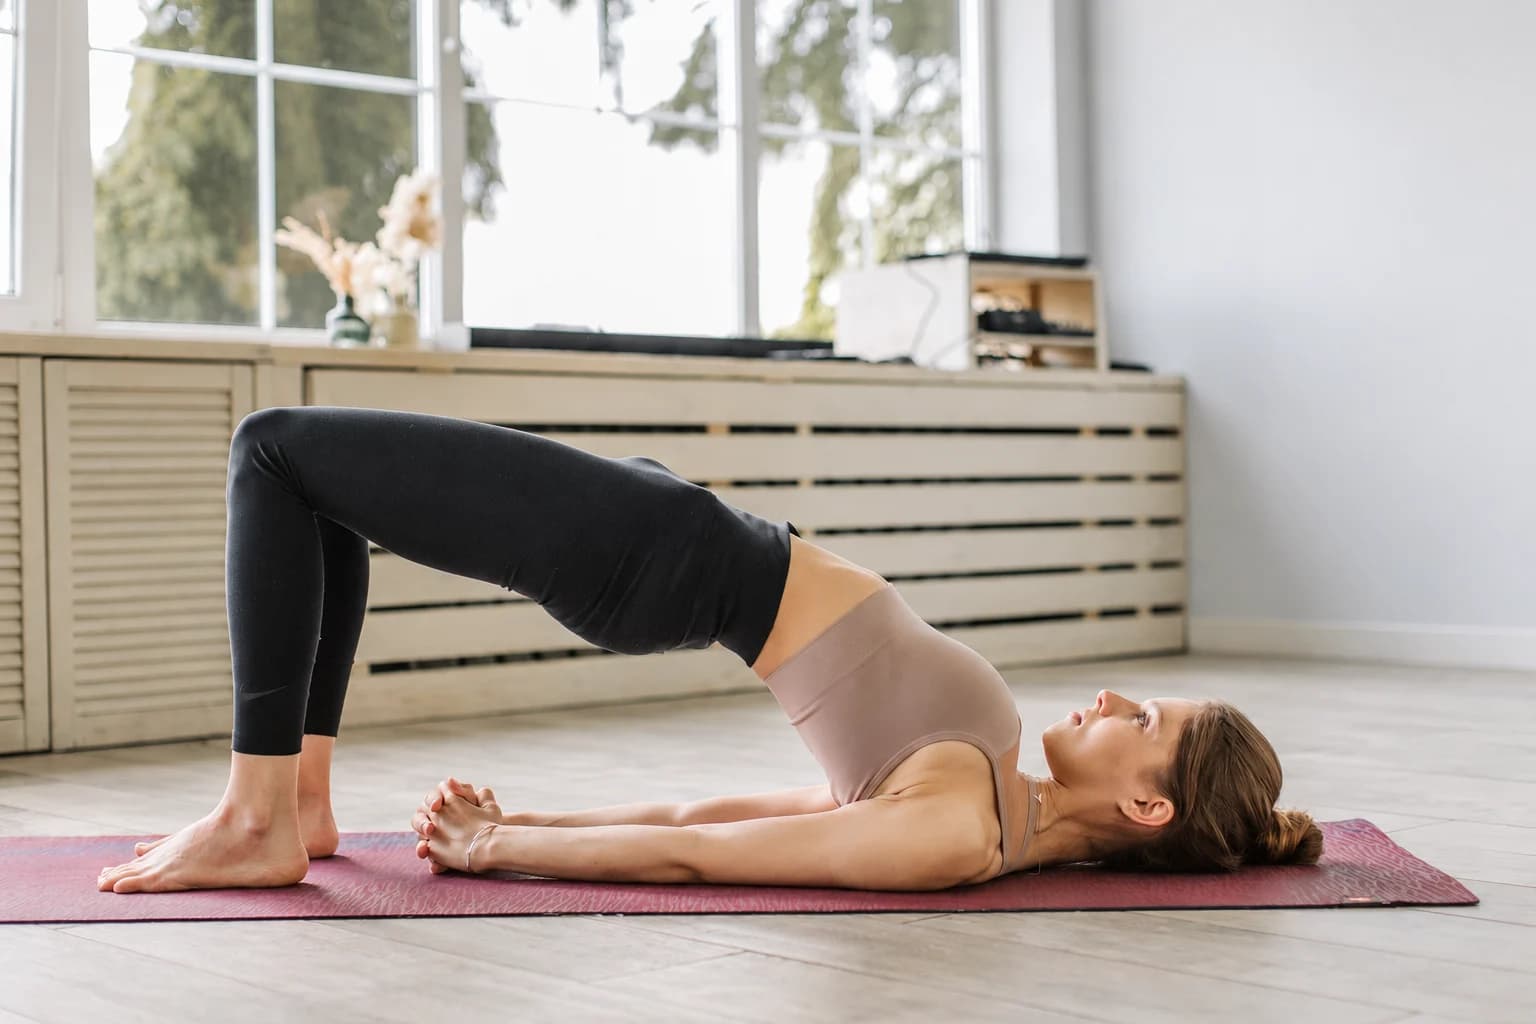
Lie on your back with knees bent, heels securely on the discs and the resting body comfortably supported. Keep the sliding lane beyond the mat edge. With hips resting, slide one heel away a short distance and bring it back, then change sides. This heel-slide rehearsal lets you learn the contact and return without holding a bridge.
For a sliding hamstring curl, first check that an ordinary bridge is comfortable. NIFS includes slider hamstring curls among its exercise options; its more demanding training examples do not set the workload for learning the pattern.
- Start with knees bent, feet about hip-width apart and arms resting beside you. Keep the neck comfortable and look upward.
- Lift the hips into a low bridge you can maintain while breathing, without a strong lower-back arch.
- Slide both heels away a small distance, keeping some knee bend and approximately level hips.
- Bring the heels back under control, then lower the hips to rest. The outward and return portions form one repetition.
As the heels move away, the longer position can make the return more demanding. If you can slide out but cannot come back, lower the hips deliberately, reset and use less travel next time. An ordinary bridge or resting-hip heel slide remains available. Do not turn a failed long return into repeated eccentric-only curls by default. Stop for cramp or sharp discomfort instead of forcing another repetition.
Slider mountain climbers: one knee at a time
Start from a comfortable stationary high plank. Plant the hands securely, place each forefoot on its own disc and arrange the shoulders roughly above the wrists. Keep the neck in a comfortable continuation of the trunk. If hand support is painful or the starting plank is unmanageable, choose another exercise.
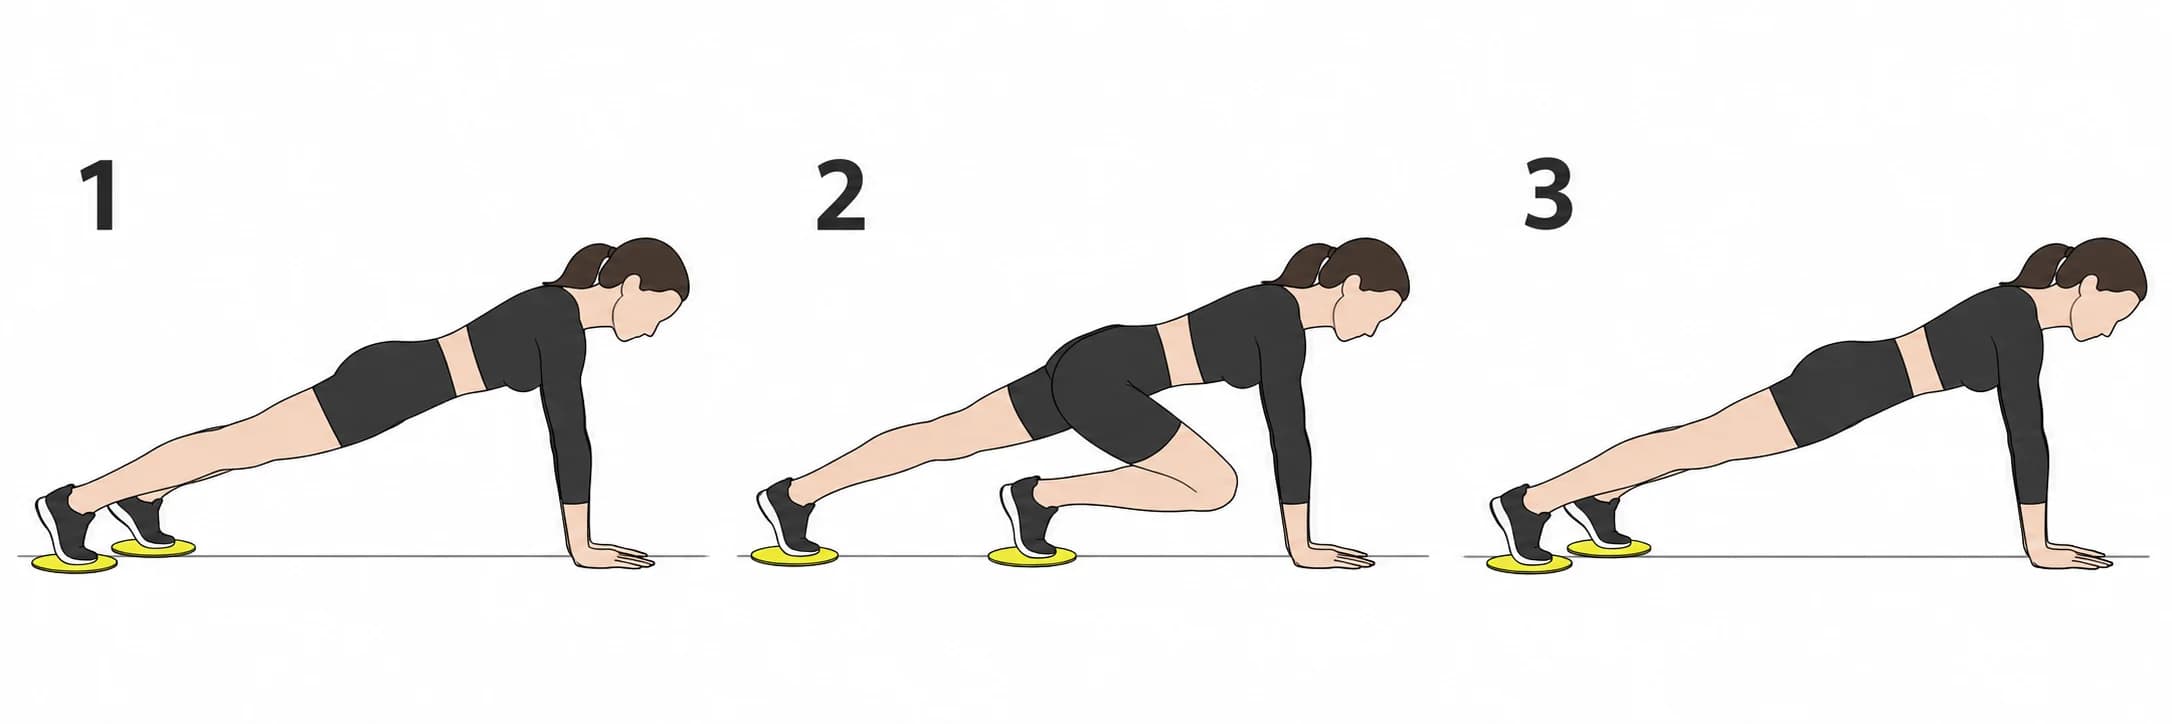
- From the supported plank, slide one knee forward only as far as you can keep the pelvis controlled.
- Pause without throwing the shoulders forward to chase the knee.
- Return that foot to its starting position before moving the other knee.
- Reestablish the plank between sides. Lower the knees before repositioning a foot or disc.
Mountain climbers with sliders do not require a knee-to-chest target or a running pace. Keep both feet securely on their own discs and avoid crossing them. Shorten the slide if the hips swing, rise sharply or sag. Once individual returns remain steady, you can connect them into a slow alternating sequence without increasing the range at the same time.
Slider knee tucks: both feet move together
Double knee tucks on sliders add simultaneous foot movement to the high plank. They are a separate progression from alternating knees. First rehearse getting into the plank one leg at a time and lowering the knees to exit; avoid jumping onto the discs.
The American Council on Exercise slider article identifies knee tucks with a disc under each foot. Start with a short version: bend both knees and bring the feet forward together, pause, then slide them back until you reach the plank you started with. Let the knees bend rather than folding into a straight-leg pike.
Judge the final part of the return. Stop before the belly drops, shoulders collapse or feet continue beyond the original position. If one foot moves ahead, unload and check contact and the lane instead of twisting to finish. Return to a slow single-knee slide or stationary plank when both feet moving together is too demanding.
Slider body saw: a small forearm-plank glide
A forearm plank body saw keeps a similar long body shape while the feet slide a little backward and forward. The knees stay nearly straight; the hips do not fold upward to pull the feet in. Your forearms need a stable surface while the feet need their separate sliding lane.
The Bucks Fit workout sheet includes feet-on-slider body saws. Treat this as an optional skill for someone who already controls a comfortable forearm plank, rather than a required beginner station.
- Begin kneeling with elbows roughly under shoulders. Place the forefeet securely on the discs, then extend into a comfortable forearm plank.
- Take a normal breath and confirm that the forearms stay planted.
- Allow a small backward glide while keeping the trunk shape and hip height approximately steady. Stop while you can reverse it.
- Return to the original position with shoulders roughly above elbows, then lower the knees when you need to reset.
A few centimetres may be enough to explore the task; there is no required distance. Shorten it if the hips drop on the way out or lift to bring the feet back. A stationary forearm plank can replace the moving version. If a side-view recording helps, review it after the set rather than turning the head while loaded.
Build an adjustable core sliders workout
Choose two or three exercises using sliders that serve different roles. For an initial session, that can mean a supported reverse slide, a resting-hip heel slide and optional short stationary plank practice. The six options above are a menu, not a circuit you must complete.
Begin with easy walking or comfortable general movement, then rehearse the positions without sliding. This exercise slider workout example leaves time to unload and reset. Every count and rest period is adjustable; stop before support, breathing or the return changes.
| Station | First-session example | Reset |
|---|---|---|
| Standing leg control | 3-5 short supported reverse slides per side. | Step off, stand normally and check the lane. |
| Floor contact control | 3-5 resting-hip heel slides per side. | Bring the feet back, relax and breathe. |
| Optional trunk control | A brief comfortable stationary plank, or 2 slow knee slides per side. | Lower the knees before moving equipment. |
| Review | Rest about 45-90 seconds, or longer when needed. | A second round is optional if the same control remains. |
One round can be the whole first session. Let the timer organise rest without rushing the move from standing to the floor. After a demanding session, allow recovery appropriate to your wider routine; there is no need for a daily slider streak. Stop for pain, dizziness or unusual symptoms.
When the same version remains controlled across sessions, change one feature: another repetition, a little range, less hand assistance or another round. More advanced ab exercises with sliders, such as paired knee tucks and body saws, can be separate skills to learn later. Training your core with sliders does not require choosing the hardest moving plank.
Towels and bodyweight alternatives
For the curl pattern, NISMAT's hamstring-slider example uses a towel under the feet, a bridge, a slide away and a controlled return. That is a specific towel-based exercise option, rather than evidence that towels substitute for discs in every movement.
A towel may grip, bunch or trap grit, and it does not reproduce a disc's shape or foot contact. Check floor-care permission and the actual setup, using a light test before loading. Do not assume it will slide on carpet or protect every wood finish. Keep the bridge-and-curl range short enough to return under control.
If a permitted towel setup does not start and stop predictably, use a non-sliding exercise. A shallow supported split squat can replace the backward slide; an ordinary side lunge can replace the sideways slide. A stable-floor bridge is an alternative to the bridge-and-curl combination. A comfortable stationary or knee-supported plank removes moving feet from the trunk task.
These choices change the task rather than provide identical resistance. Use them when they make support, contact and breathing manageable. You can also omit a station. Neither sliders for ab exercises nor a household substitute needs to become a test of how much instability you can tolerate.
Keep the setup and the return in your record
Write down the disc model and side, floor, footwear, movement version, range and completed out-and-back repetitions. Add the first point where control changed: a heel lifting, a disc catching, a hip dropping or a return needing momentum. A floor change can alter a familiar exercise, so treat it as a new setup check.
A note such as “four short supported reverse slides each side; stable front heel; smooth return” tells you what to repeat. “Hard slider exercises” gives less direction. Finish by unloading, checking the contact faces and floor, cleaning as instructed and storing the discs dry.